Peter McBride
home
| antique and old tools | links | email
TOOL MAKING PAGE
Making a dovetailed skew mouth rebate chariot plane.
Page 1
click here for : page 2 | page 3 | page 4 | bull nose chariot
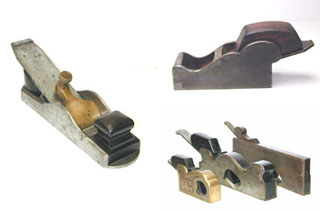
I like to use a skew rebate plane to clean and size the sides of tenons, and have used a Millers Falls #07 block plane (a clone of the Stanley #140) , and a cast brass shoulder plane which I restored. (see this page for details) I like the shoulder plane but it lacks width sometimes, and the #140...well just isn't as "nice" as an infill plane. For years I've looked out for a badger style block plane with a skew blade, but the only one I've ever seen is a bull nose type in a tool collection and not for sale. Anyhow I think it's a bit on the short side, and I would prefer one like the cast gunmetal chariot pictured below, but with the blade emerging from the right side like the #140.
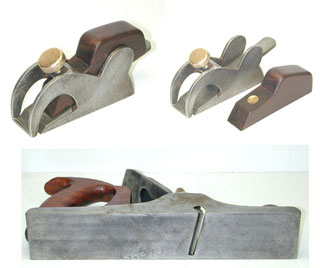
This is a picture of the finished plane, read through the pages to see how it was made.

Various elements from all these planes in my collection will go into the design of the plane. The tiny tongue and groove that joins the 2 base pieces at the throat of my Spiers Mitre Plane, the shape of the wedge on the Musgrave (by Norris) bull nose Chariot plane, the opening in the side like the Spiers rebate shoulder planes, the wedge tightening screw like the little user-made bull nose rebate plane below, but with the opening in the right-hand side of the body like the badger planes.


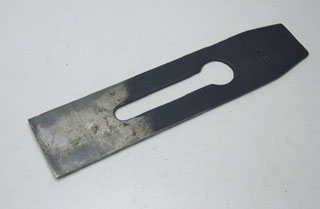
Firstly I went to the box of blades and found an unused 1&11/16 inch (43mm) Mathieson blade that I think is an ideal length & width. I'll grind the one side into a shape to suite a rebate plane body, and grind the edge skew when the plane is built.
Then after a few idea sketches, I did a full size drawing to use for construction.

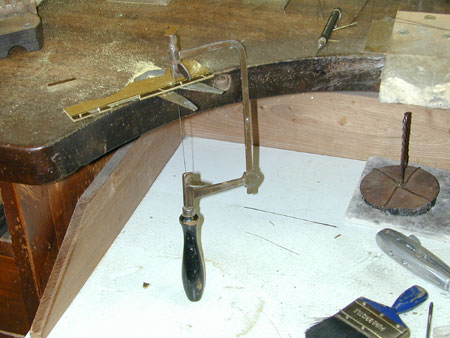
I had some 3mm brass sheet, so cut the sides out using a jeweller's saw on my jewellery making bench.

After laying out the dovetails, into the vise the sides went, and using a hack saw I cut down to just above the line in the waste.
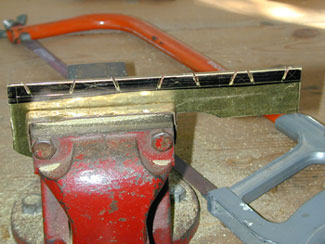
Back to the jeweller's bench to cut out the waste
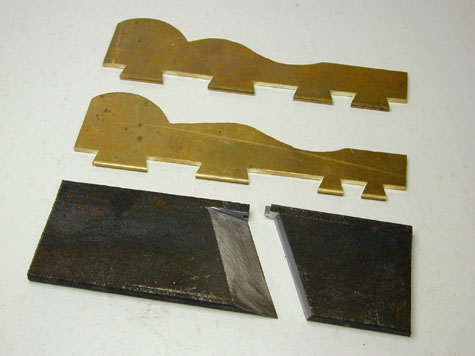
Then back into the vice and I accurately filed out the remainder of the waste, paying particular attention to the base line. Looking good so far.


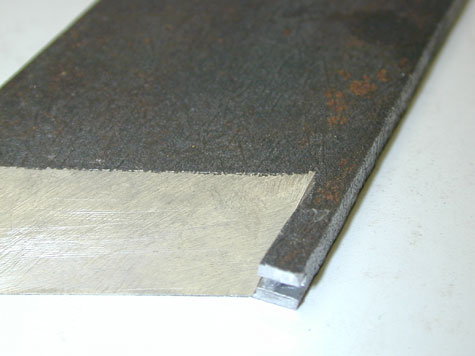
The next step was to start the base. I looked in my pile of steel scraps and found a piece of 1/4 inch mild steel, cut it to approximate width with the hacksaw, then cut through the mouth. Then the back piece went back into the vice, and very carefully cut down at the blade angle leaving a lug to form the nifty tongue and groove joint on the left side.
Getting a nice flat bed for the blade took more time than expected, but time well spent to getting it right will be rewarded later. I started to file the front of the mouth opening, but will file more later after I determine the exact position of the dovetails and the cutout of the side plate on the open right hand side.

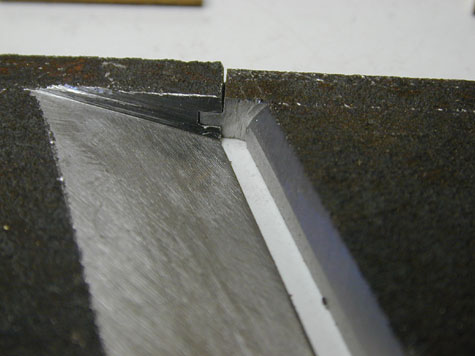
This joint was surprisingly easy to do, and once tapped a few times at the back of the base whilst laying flat gave a good deal of rigidity to the base, even though it is only on one side. These T&G joints are seen on almost all infill miter planes, and I've also seen them on some early smoothing and panel planes. ( I'll keep that in mind when I start making larger planes.)
more when time becomes available...
Click HERE for page 2
Copyright © Peter McBride 2006